Din indkøbsvogn er tom
The Night Owl Effect: How Time of Day Changes Your Iris Photos

"The eyes are the mirror of the soul." This timeless saying holds more truth than we might realize, especially when it comes to photography. Have you ever noticed how your eyes seem to tell a different story at dawn compared to dusk? The time of day doesn't just affect the lighting of your surroundings—it alters the very essence of how your irises appear in photos.
The Dance of Light and Iris
Light is the most crucial element in photography. It shapes the mood, highlights details, and influences colors. When capturing the intricate patterns of the iris, the interplay of light and time becomes even more significant.
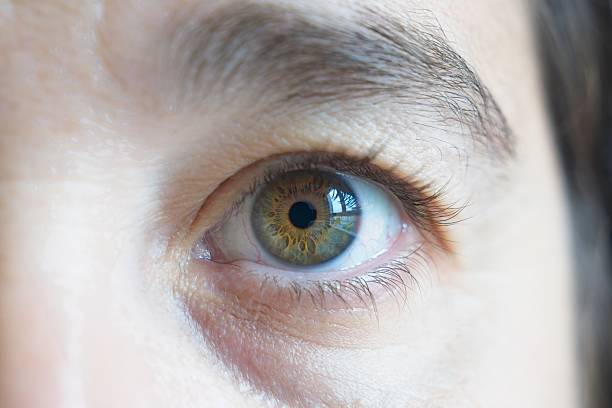
![Close-up image of an eye reflecting morning light]
How Light Affects Iris Appearance
-
Intensity and Angle: The sun's position changes the intensity and angle of light entering the eye.
-
Color Temperature: Morning and evening light have warmer tones, affecting iris coloration.
-
Pupil Dilation: Varies with light levels, revealing more or less of the iris.
Morning Magic: Capturing Eyes at Dawn
There's something ethereal about the early morning hours. The soft, diffused light of dawn brings out the subtle hues and textures of the iris, offering a gentle glow that's hard to replicate.
Benefits of Morning Iris Photography
1. Soft Lighting: Reduces harsh shadows, enhancing fine details in the iris. 2. Warm Tones: Early sunlight adds a golden hue, enriching eye color. 3. Fresh Eyes: After rest, eyes are less strained, appearing clearer and more vibrant.
![Image placeholder: Eye in soft morning light]
Tips for Morning Shoots
-
Embrace the Golden Hour: Aim for the first hour after sunrise for the best light.
-
Face the Light Source: Position yourself so the light illuminates the eyes directly.
-
Use Reflectors: Bounce additional light into the eyes to enhance sparkle.
The Midday Challenge
As the sun climbs higher, the light becomes harsher. Midday sun can wash out colors and create unflattering shadows, making iris photography more challenging.
Overcoming Harsh Light
-
Seek Shade: Find areas with diffused light to soften shadows.
-
Use Polarizing Filters: Reduce glare and enhance color saturation.
-
Adjust Camera Settings: Lower the ISO and use faster shutter speeds to avoid overexposure.
Evening Enchantment: The Allure of Dusk
When the sun begins to set, the world is bathed in warm, rich tones. Evening light adds depth and drama to iris photos, highlighting contrasts and deepening colors.
Advantages of Evening Photography
1. Rich Colors: The warm hues intensify eye color, especially blues and greens. 2. Long Shadows: Create a sense of depth and dimensionality. 3. Relaxed Atmosphere: Subjects often feel more at ease, leading to natural expressions.
![Image placeholder: Eye reflecting sunset hues]
Techniques for Capturing Evening Glow
-
Utilize Backlighting: Position the sun behind the subject for a halo effect.
-
Experiment with Silhouettes: Emphasize the shape and outline of the eye.
-
Capture Reflections: Look for reflections of the sunset within the eye.
Nighttime Nuances: After Dark Adventures
Photography doesn't have to stop when the sun goes down. Nighttime presents unique opportunities to capture the iris under artificial lighting or moonlight.
Exploring Night Iris Photography
-
Artificial Light Sources: Street lamps, neon signs, or LED lights can add interesting effects.
-
Long Exposure Techniques: Capture ambient light and add motion blur creatively.
-
Flash Photography: Use with caution to avoid red-eye and harsh reflections.
The Circadian Rhythm Connection
Our bodies operate on a circadian rhythm—a natural, internal process that regulates the sleep-wake cycle. These rhythms also influence our eyes, subtly altering their appearance throughout the day.
Effects on Iris Photography
-
Pupil Size Fluctuations: Affects how much of the iris is visible.
-
Eye Moisture Levels: Can increase shine or cause dryness, impacting reflections.
-
Color Perception Variances: Fatigue or alertness may change how eye color is perceived.
Comparing Morning and Evening Captures
Morning and evening light offer distinct qualities that can dramatically change the mood and aesthetic of your iris photos.
Morning vs. Evening: What's the Difference?
| Aspect | Morning | Evening | |--------------------|--------------------------------------------------|------------------------------------------------| | Light Quality | Soft, diffused | Warm, directional | | Eye Appearance | Fresh, bright | Deep, intense | | Mood Conveyed | Renewal, optimism | Reflection, tranquility | | Color Accents | Pastels, subtle tones | Vibrant, saturated hues |
Mastering the Art of Timing
Timing is everything in photography. Knowing when to shoot can mean the difference between a good photo and a breathtaking one.
Strategies for Perfect Timing
1. Plan Ahead: Use apps to track sunrise and sunset times. 2. Observe Weather Conditions: Cloud cover can soften or obscure light. 3. Be Patient: Wait for the right moment when the light complements the eye.
Equipment Essentials for Iris Photography
To capture the intricate details of the iris, the right equipment is essential.
Must-Have Gear
-
Macro Lens: Allows for extreme close-ups without losing focus.
-
Tripod: Stabilizes the camera for sharp images.
-
Remote Shutter Release: Prevents camera shake during shooting.
-
Lighting Accessories: Reflectors, diffusers, or ring lights to control illumination.
Post-Processing Perfection
Even the best shots can benefit from post-processing. Editing enhances features and corrects minor flaws, bringing your iris photos to life.
Editing Techniques
-
Adjust Exposure and Contrast: Ensure the iris details are visible and striking.
-
Enhance Colors: Slight saturation boosts can make eye colors pop.
-
Sharpen Details: Highlight the unique patterns within the iris.
-
Reduce Imperfections: Clean up any blemishes or reflections that distract from the eye.
![Image placeholder: Before and after editing comparison]
Telling a Story Through Eyes
Eyes are profoundly expressive, and capturing them at different times can convey a range of emotions and narratives.
Emotional Impact by Time of Day
-
Morning Eyes: Suggest hope, new beginnings, and innocence.
-
Evening Eyes: Evoke mystery, wisdom, and contemplation.
-
Night Eyes: Portray intrigue, depth, and sometimes melancholy.
Incorporating Environmental Elements
The surroundings can enhance iris photos. Reflections of landscapes, skylines, or even the photographer add layers of interest.
Creative Ideas
-
Capture Reflections: Position subjects to reflect sunsets or city lights in their eyes.
-
Use Natural Frames: Frame the eye with elements like leaves or hands for added depth.
-
Play with Shadows: Use shadows creatively to highlight the eye.
Common Mistakes and How to Avoid Them
Even experienced photographers can stumble. Being aware of common pitfalls ensures your iris photos shine.
Mistakes to Watch Out For
1. Ignoring Lighting Conditions: Not adjusting for changes in light leads to poor exposure. 2. Overusing Flash: Can cause red-eye and unnatural reflections. 3. Lack of Focus: Without sharp focus on the iris, details are lost. 4. Background Distractions: Cluttered backgrounds can draw attention away from the eye.
Solutions
-
Always Check Settings: Adjust ISO, aperture, and shutter speed as needed.
-
Use Natural Light When Possible: Provides the most flattering illumination.
-
Focus Manually: Ensure the iris is the sharpest point in the image.
-
Simplify the Scene: Keep backgrounds minimalistic to highlight the eye.
The Role of Emotion and Connection
Building a rapport with your subject can lead to more authentic and compelling eye photographs.
Engaging with Your Subject
-
Communicate Clearly: Explain your vision and make them comfortable.
-
Encourage Natural Expressions: Genuine emotions reflect beautifully in the eyes.
-
Be Patient: Allow time for the subject to relax and reveal their true self.
Expanding Your Horizons: Beyond Humans
Eyes are not exclusive to people. Animal eyes offer a whole new world of photographic possibilities.
Exploring Animal Iris Photography
-
Diverse Colors and Patterns: Animals have a vast range of eye appearances.
-
Unique Reflections: Wildlife settings provide interesting environmental reflections.
-
Behavioral Moments: Capturing animals in their natural habitat adds storytelling elements.
![Image placeholder: Close-up of an animal eye]
Conclusion: Seize the Light, Capture the Soul
The time of day profoundly impacts iris photography, influencing light quality, color, and mood. By understanding and embracing these changes, you unlock the ability to capture images that are not just photographs but windows into the soul.
So next time you plan a shoot, consider the clock, step outside at different hours, and watch as your iris photos transform with the shifting light. Embrace the morning's promise, the evening's warmth, or the night's mystery—each bringing a unique beauty to your lens.
Discover the World Through New Eyes
Ready to elevate your photography? Take on the challenge of shooting at various times and witness how the subtle changes in light and circadian rhythms breathe new life into your iris images. Your journey through the interplay of time and eye awaits.
Efterlad en kommentar
Kommentarer vil blive godkendt, før du vises.


